Before installing Make sure SharePoint 2010 Foundation is installed.
Installation of Office 2010 Web Apps
- Download Beta from http://www.microsoft.com/downloads/details.aspx?FamilyID=27d81b1c-18ae-4983-8e1c-224bb747eb99&displaylang=en
- Run WCsever_en-us.exe.
- Enter your Product Key page, enter your product key, and then click Continue.
- On the Choose a file location page, click Install Now to install to the default location. To install to a different location, specify the location that you want to install to, and then click Install Now.
- When Setup finishes, a dialog box prompts you to complete the configuration of your server. Be sure that the Run the SharePoint Products and Technologies Configuration Wizard now check box is selected.
Click Close to start the configuration wizard. (if it doesn’t run execute PSConfig.exe to register services)
- On the Welcome to SharePoint Products page, click Next.
- In the dialog box that notifies you that some services might need to be restarted or reset during configuration, click Yes.
- On the Modify server farm settings page, select Do not disconnect from this server farm, and then click Next.
- On the Configuration Successful page, click Finish. Your new SharePoint site opens.
- Click Start, point to All Programs, Microsoft SharePoint 2010 Products, and then SharePoint 2010 Central Administration.
- On the SharePoint Central Administration home page, click Configuration Wizards.
- On the Configuration Wizards page, click Launch the Farm Configuration Wizard.
- In the Farm Configuration Wizard welcome page, choose Walk me through the settings using this wizard, and then press Next.
- On the Configure your SharePoint Farm page, in Service Account, type a name for the Farm admin account.
- In Services, select the Office Web Apps services that you want to activate, and then click Next.
- Create an optional new top-level site. On the Create Site Collection page, follow the wizard steps to create a new top-level site.
- On the Configure your SharePoint Farm page, click Finish. Your Office Web Apps configuration is complete.
Repeat for all SharePoint servers in the farm
You have to enable the feature on each site collection (either in the UI or Powershell.
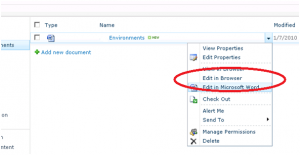
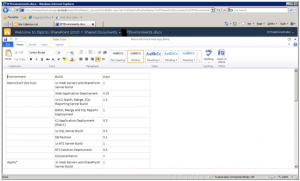
When entering a document library you can now select Edit in Browser (not edit in word). 
More information on activating and installing Office Web Apps (from http://technet.microsoft.com/en-us/library/ee695758(office.14).aspx:
Activate the Office Web Apps feature on all site collections
Office Web Apps require that the Office Web Apps feature be activated on every site collection for which the Web apps will be available. Activate the Office Web Apps feature for all site collections by running the following script:
$webAppsFeatureId = $(Get-SPFeature -limit all | where {$_.displayname

-eq "OfficeWebApps"}).Id

Get-SPSite –limit ALL |foreach{

enable-SPFeature $webAppsFeatureId –url $_.URL }
Additional configuration (optional)
After activating Office Web Apps, the Default click feature in SharePoint Server will point to the Office Web Apps instead of the Office client application. You can override this functionality in SharePoint Server at the site collection and document library levels. The following Windows PowerShell scripts provide examples on how to change the default click behavior for each level:
Site collection – This example disables the Default click setting at all site collections:
$webAppsFeatureId = $(Get-SPFeature -limit all | where {$_.displayname

-eq "OpenInClient"}).Id

Get-SPSite –limit ALL |foreach{

Enable-SPFeature $webAppsFeatureId –url $_.URL }
Document library – This example disables the Default click setting at all document libraries in site1:
Get-SPWeb –site http://foo/sites/site1 |% {}{$_.Lists}{$_.Update()} |% {$_.DefaultItemOpen = $false}
