
The following steps detail how to create a direct VPN connection using FortiGate Firewall into the Entra Global Security Access service to protect network traffic of all device within your corporate networks.
The scenario is focused on a FortiGate Firewall Appliance but other VPN Devices should work in a similar way.
NB: not all VPN device will work. IKEv2 Phase 2 is limited to support only GCMAES128, GCMAES192, GCMAES256 and not all device will support these cyphers.
| Step | Screenshot |
| Navigate to https://entra.microsoft.com/ Expand Global Secure Access Expand Remote Network Click “Create remote network” | 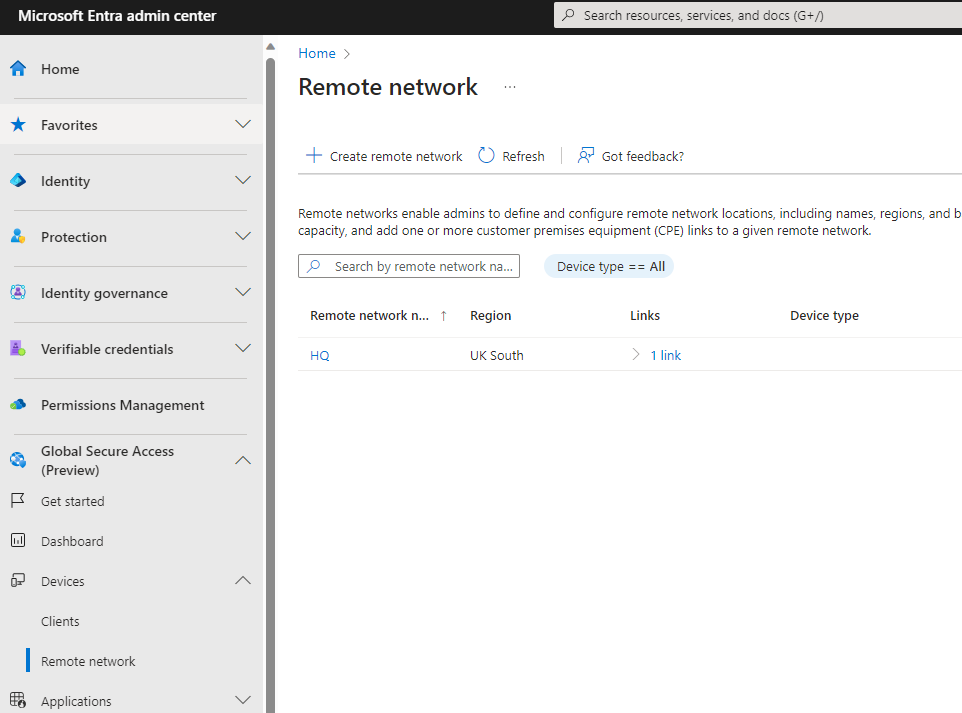 |
| Basic Information: Name: <Endpoint Name> Region: <Local Region> Click Next | 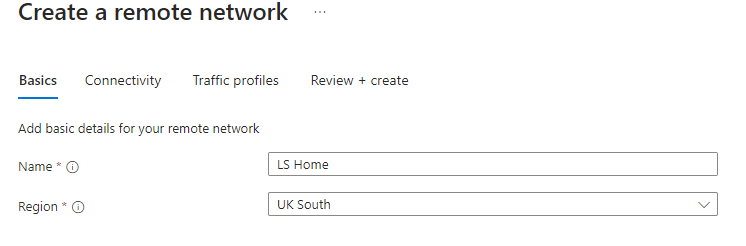 |
| Connectivity Information: Select Add a Link | 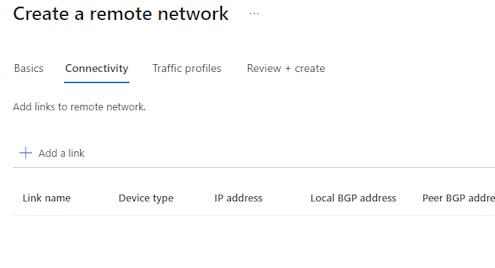 |
| Add a Link – General Information Link Name: <Name of the connected location> Device Type: <Your VPN Device Make> IP Address: <Your VPN Public IP> Local BGP Address: <Microsoft BGP IP Address which you generate and must not conflict with any existing networks> Peer BGP Address: <Your Route BGP Address> Link ASN: <Your Router BGP ASN Address> Redundancy: <Select as per your requirements> Bandwidth capacity: <Select you required capacity; 250mbps, 500mbps, 750mbps, 1000mbps> Click Next | 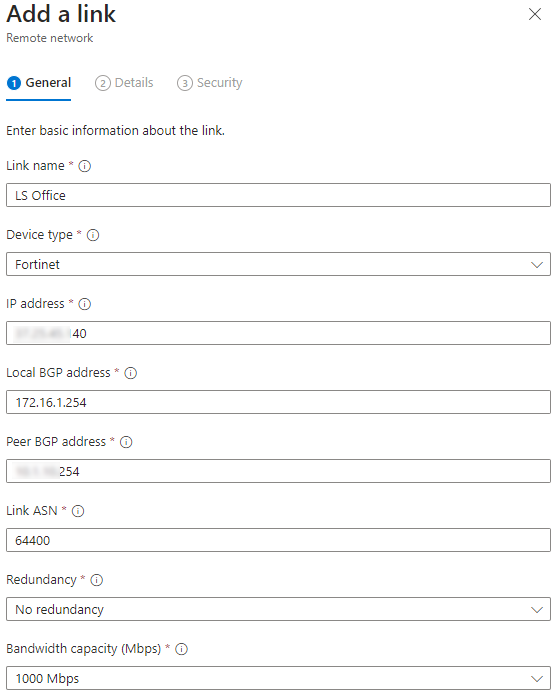 |
| Add a Link – Details Information Protocol: IKEv2 IPSEC/IKE Policy: <Default / Custom> If custom then the following options will need to be completed: IKE Phase 1: Encryption: <AES128, AES192, AES256, GCMAES128, GCMAES265> IKEv2 integrity: <SHA256,SHA384, GCMAES128, GCMAES265> DH Group: <DHGroup14,> IKE Phase 2: IPSec Encryption: <GCMAES128, GCMAES192, GCMAES256, None> IPSec Integrity: <GCMAES128, GCMAES192, GCMAES256, SHA256> PFS Group: <None, PFS1, PFS2, PFS14, PFS2048, PFSMM, SCP256, ECP384> SA lifetime (seconds): <value from 300 – 86400> Click Next Note: SA IP Range must be configured as 0.0.0.0/0 – 0.0.0.0/0 | 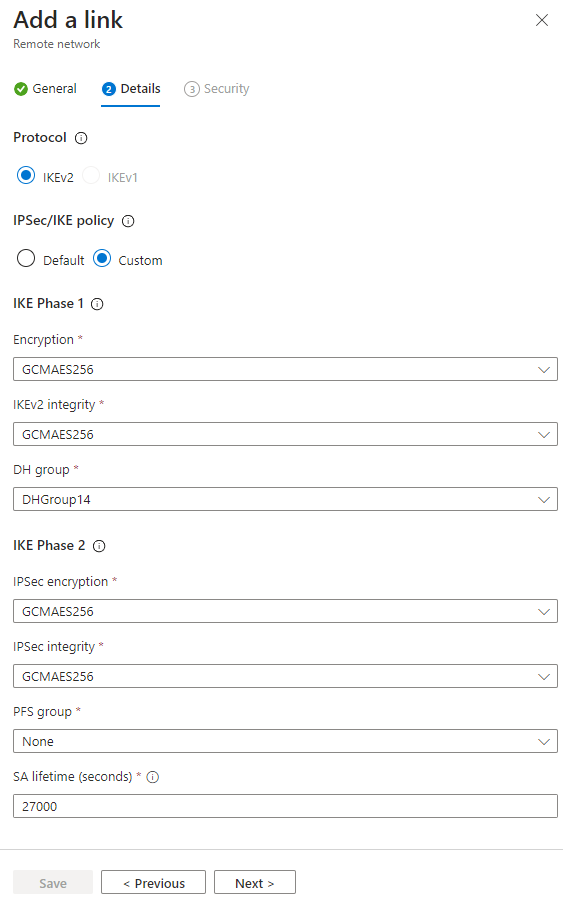 |
| Add a Link – Security Pre-shared key (PSK): <enter a key to be used on Entra and on your VPN Device> Click Save | 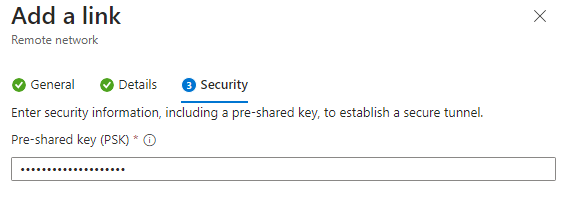 |
| Connectivity Tab Information: Click Next | 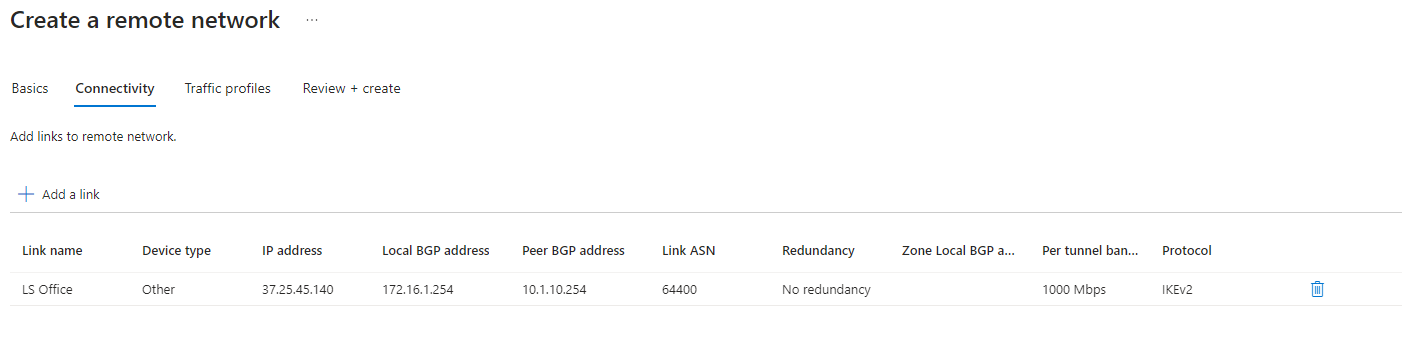 |
| Traffic Profile: Select the traffic profile for this connection | 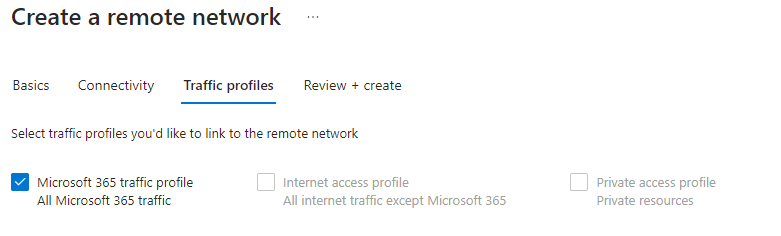 |
| Review + Create Information Confirm the information is correct Click Create remote network | 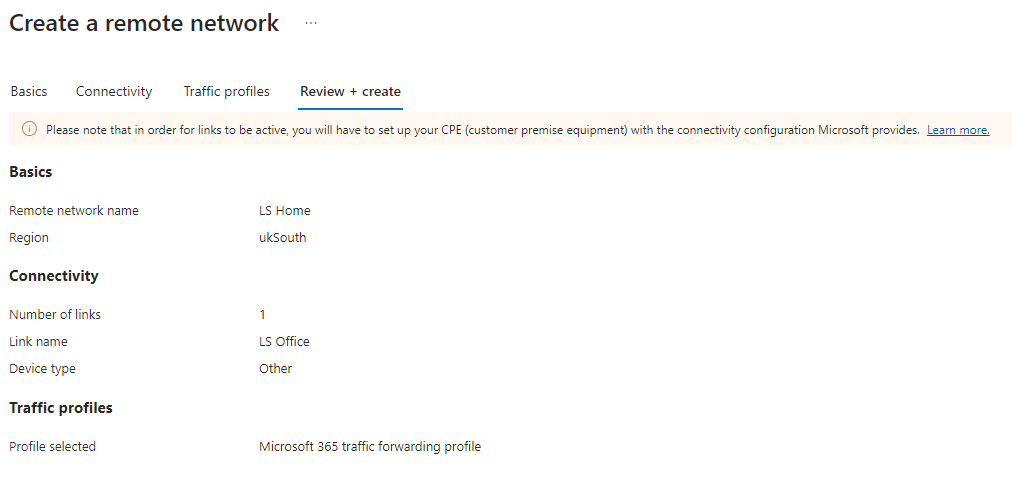 |
| From the main remote network Select view configuration |  |
| From the network configuration Click Copy and Save | 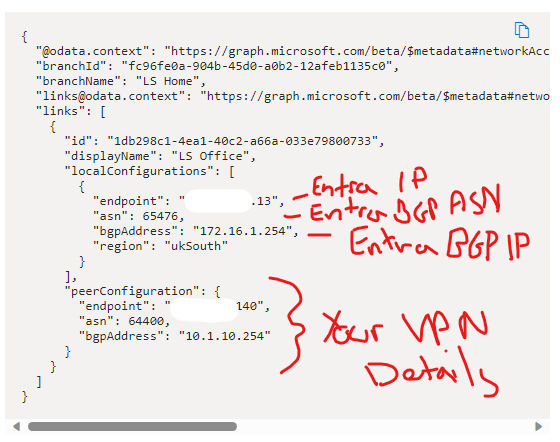 |
FortiGate Firewall Configuration
The following table details the steps to configure a FortiGate Firewall (in this instance a 60E)
| Step | Screenshot |
| Navigate to your routers IP http://x.x.x.x Expand VPN Expand IPsec Tunnel Click Create New Tunnel | 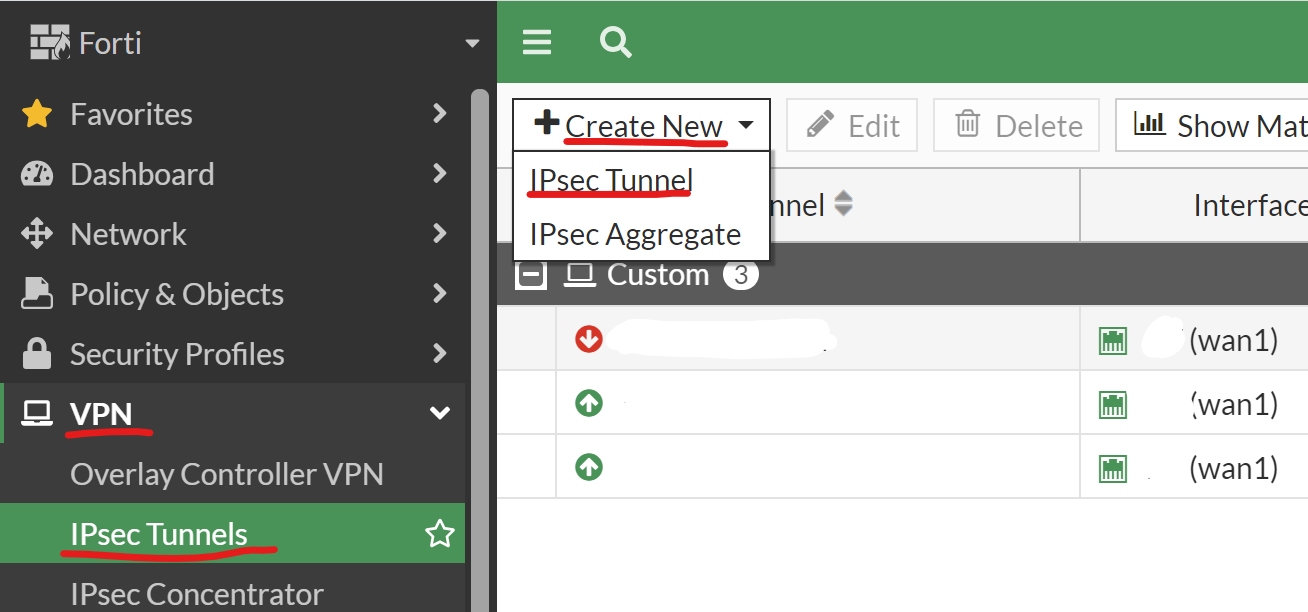 |
| Within the Wizard Name: VPNtoEntra Template Type: Custom Click Next | 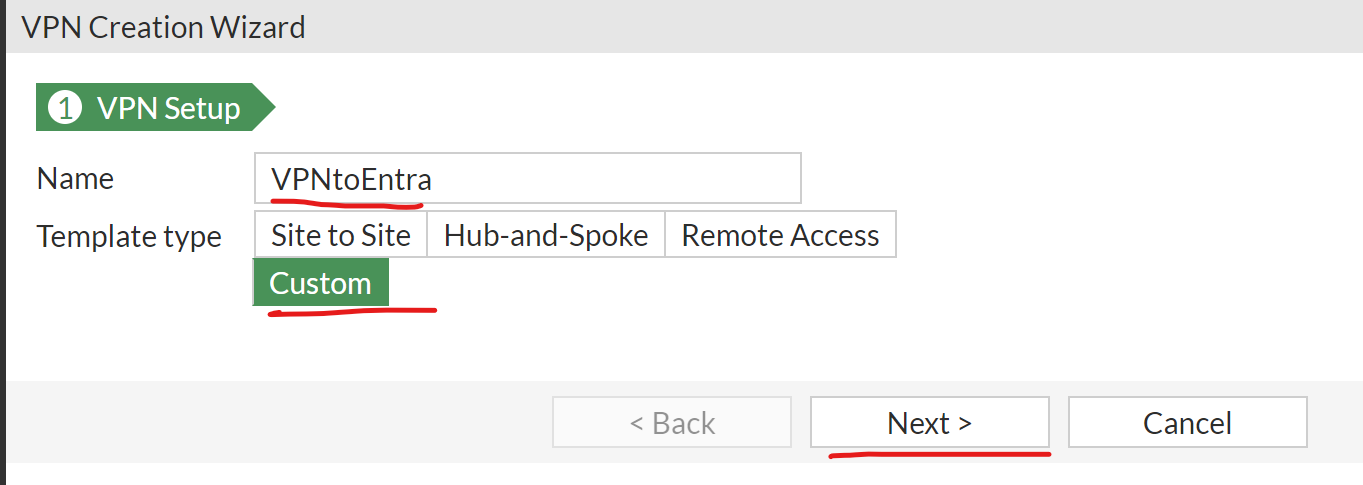 |
| On the Next Screen complete the following: IP Version: IPv4 IP Address: EntraID VPN Interface: WAN Port NAT: Disabled DPD: On Idle Method: PSK Pre-Shared Key: xxxxx IKE: 2 | 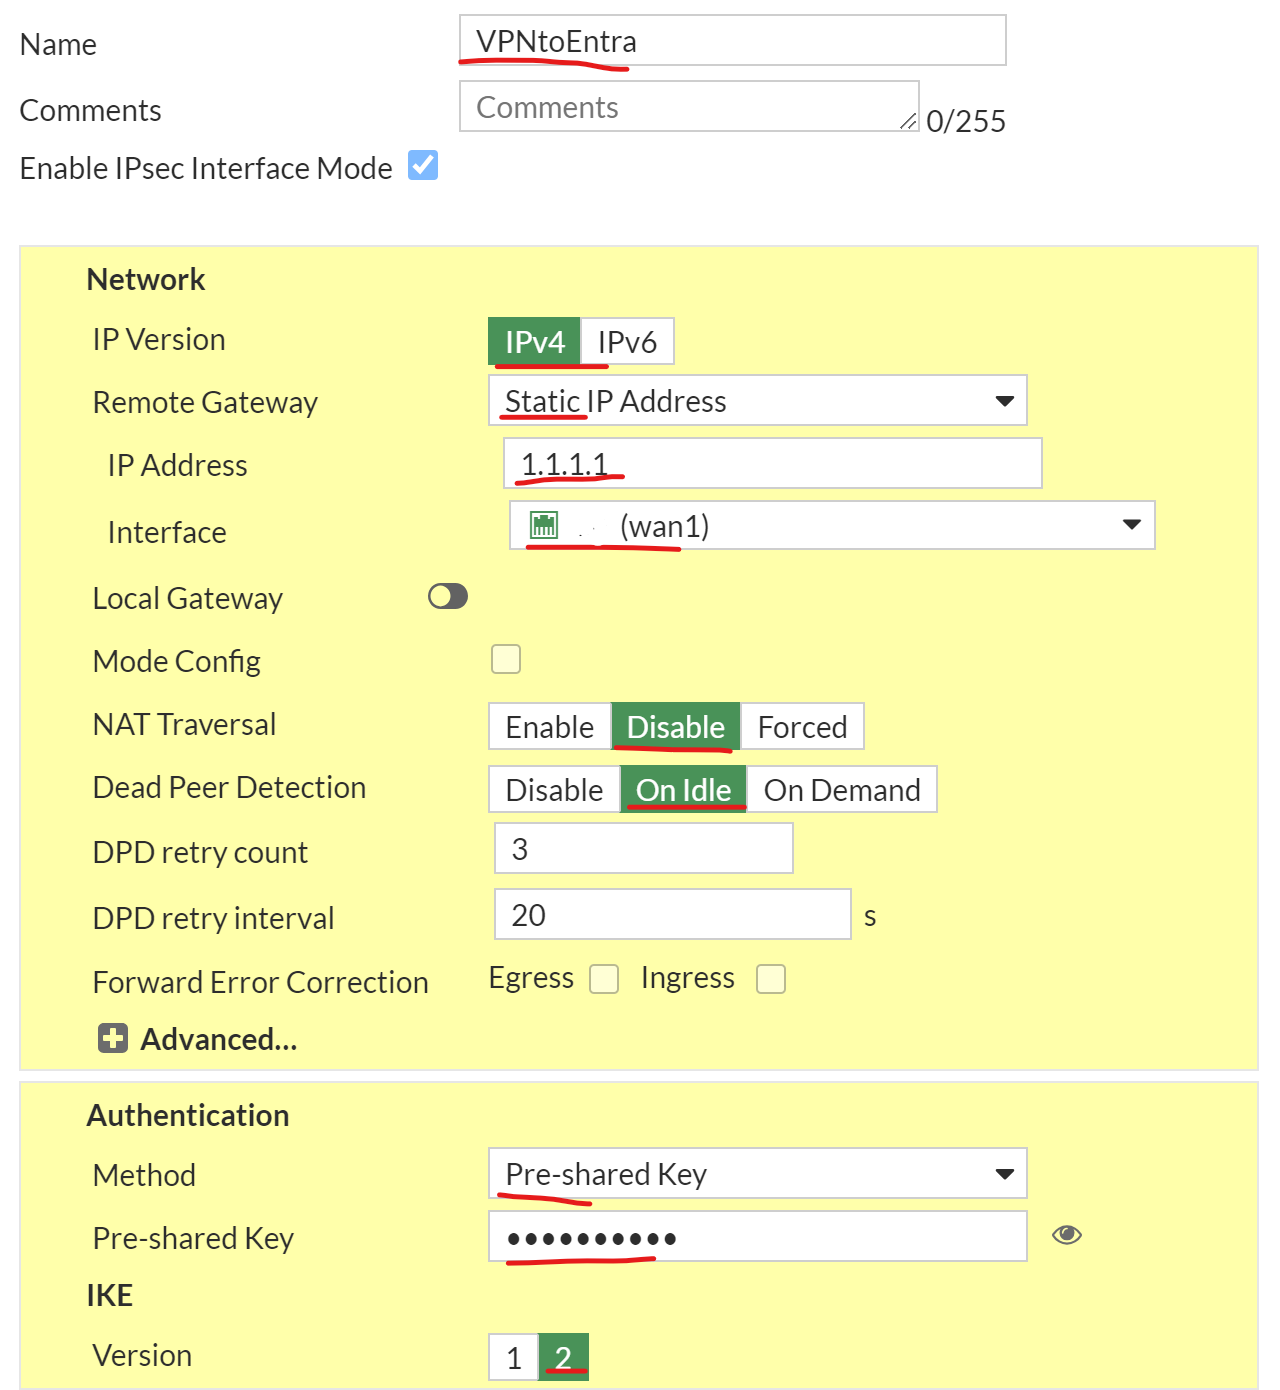 |
| Phase 1 Proposal Encryption: AES256 Authentication: SHA256 DH: G14 Key Life: 86400 Phase 2 Proposal Local Address: 0.0.0.0/0.0.0.0 Remote Address: 0.0.0.0/0.0.0.0 Encryption: AES256GCM Enable PFS: uncheck Key Lifetime: 27000 (from above) Next Click OK | 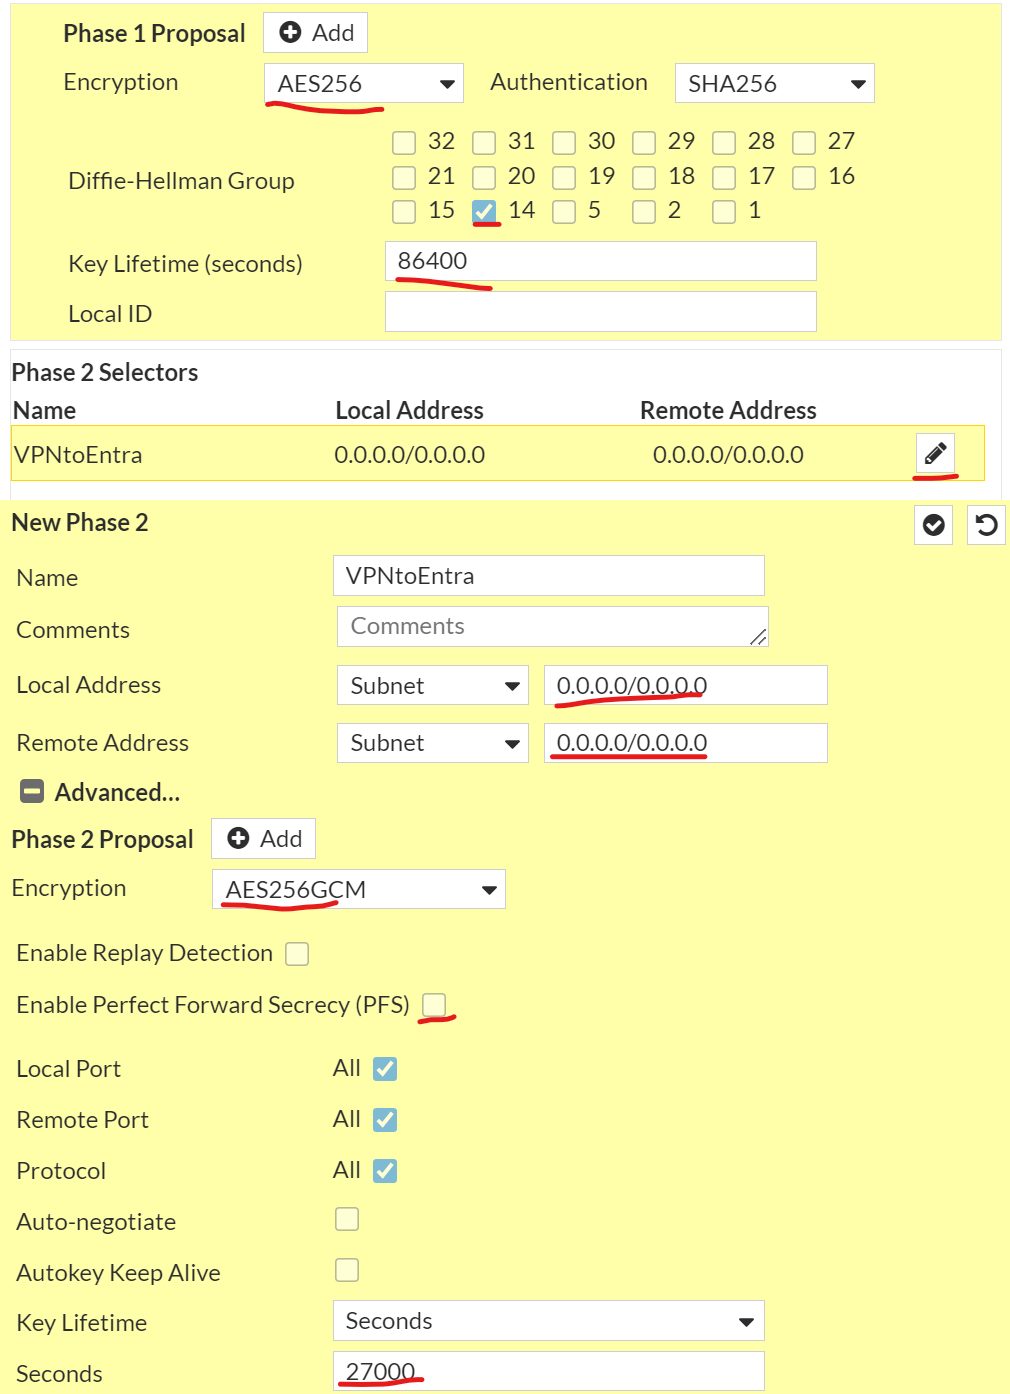 |
| Configure BGP Navigate to Network Expand BGP (if missing add via system/feature visibility) Enter your Local AS: (ASN from above) Under Neighbors Click Create New | 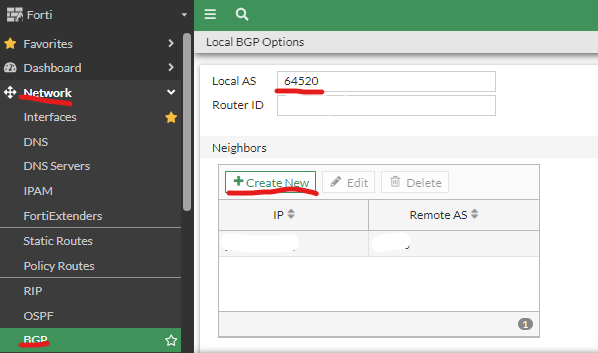 |
| Add in the Azure BGP details: IP: (Azure BGP from above) Remote AS: (Azure ASN from above) Update source: name of your IPSEC tunnel Enable Enforce eBGP multihop Enable Activate IPv4 Check Soft reconfiguration Check Capability: route refresh Click OK | 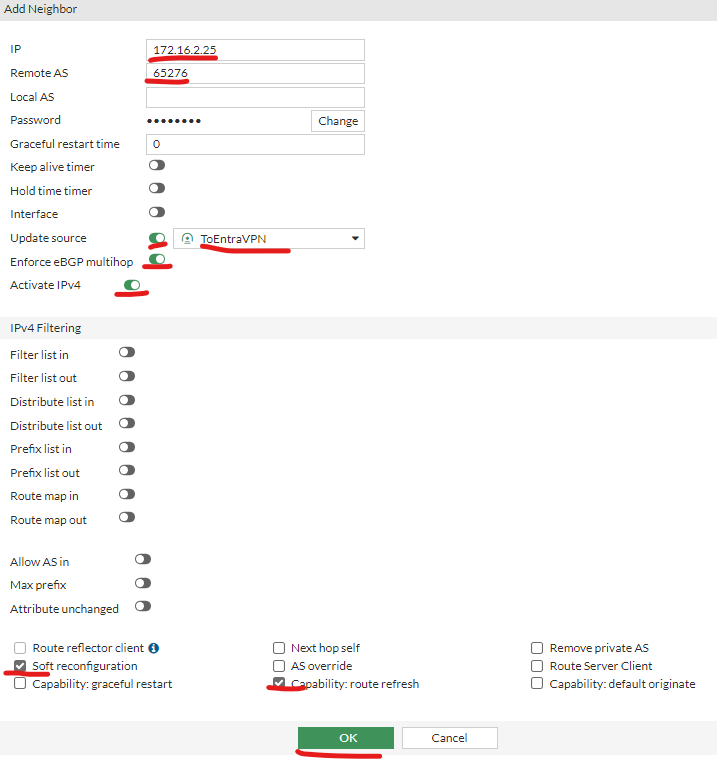 |
| Navigate to Network Expand BGP (if missing add via system/feature visibility) Add in the local networks Click Apply | 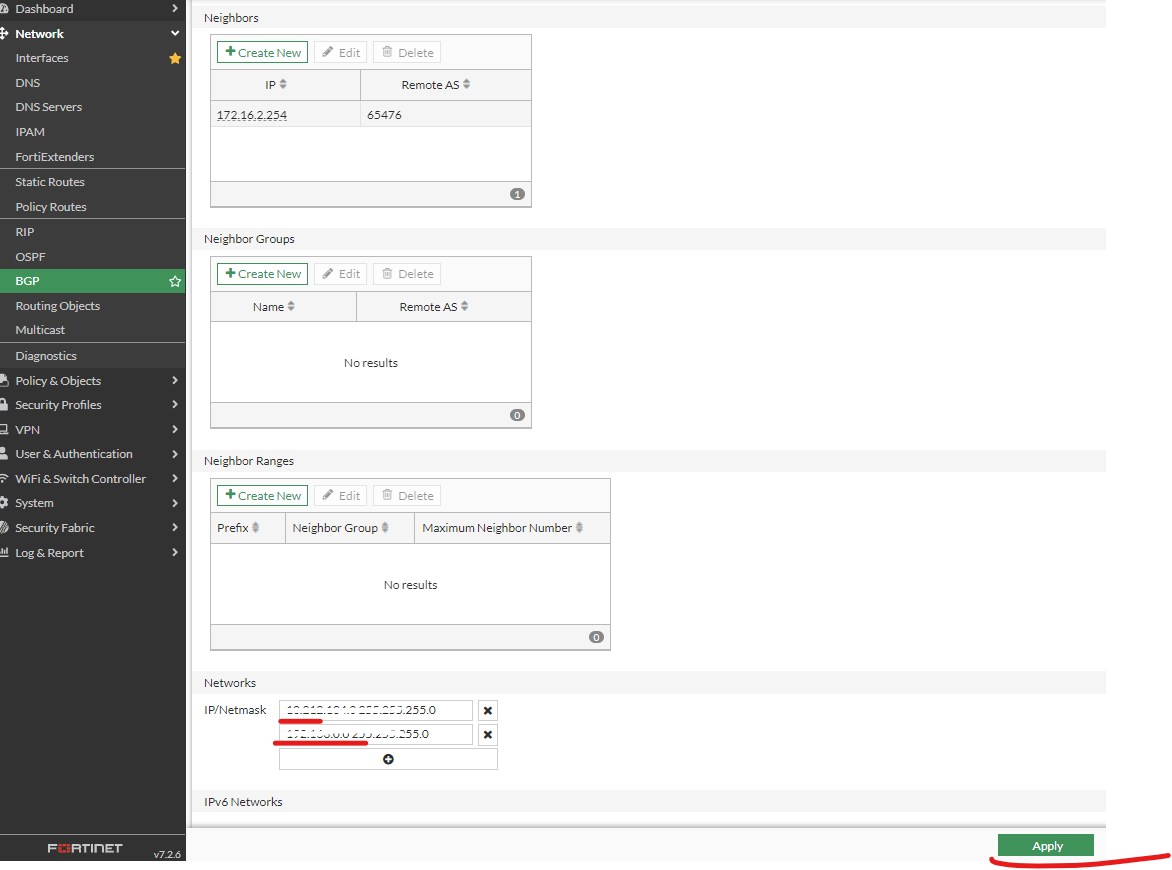 |
| Confirm the BGP has established and is not idle | 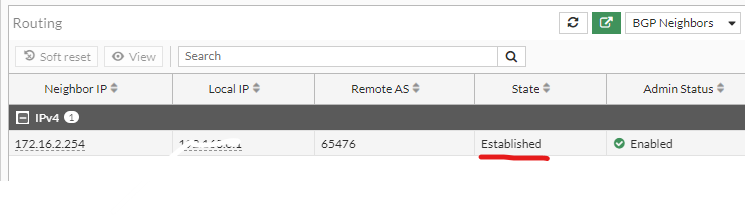 |
| And confirm that the routes are visible | 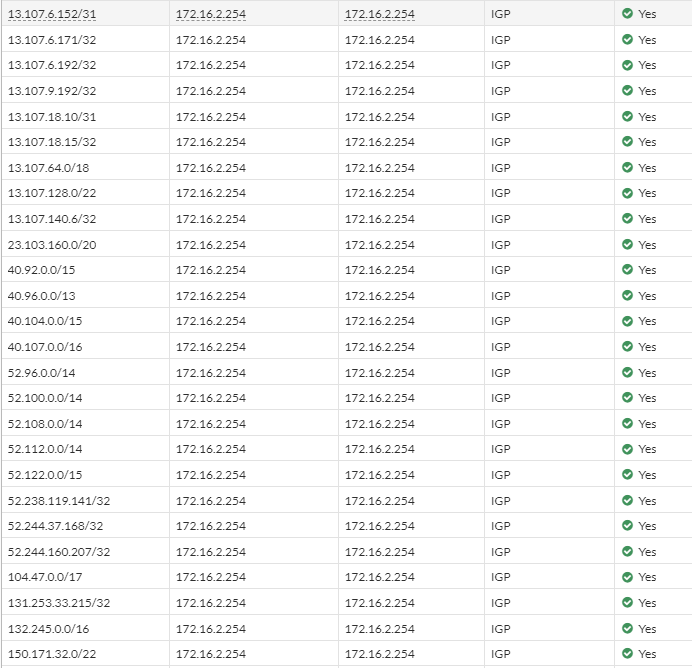 |
| Next you will need to config the firewall policy to allow the internal traffic to Entra | TBC |
Conclusion
Make sure the following are in place:
- SA is configured with the routes 0.0.0.0/0 – 0.0.0.0/0.
- Route is configured for the Entra BGP Peer within the subnet /32 i.e. 172.16.2.254/32 (172.16.2.254 being the Microsoft BGP endpoint).
- Within BGP make sure enforce eBGP multihop is enabled (if you see packets being RST/DROP from your router IP to the Azure BGP IP it’s likely because eBGP is not enabled.
- Routes to your local network is enabled in BGP